Shailesh Codes
TO BUILD A BLOG
Writing a JavaScript tagging library — what, why, and how?
Writing a JavaScript tagging library — what, why, and how?

More from TO BUILD A BLOG
What
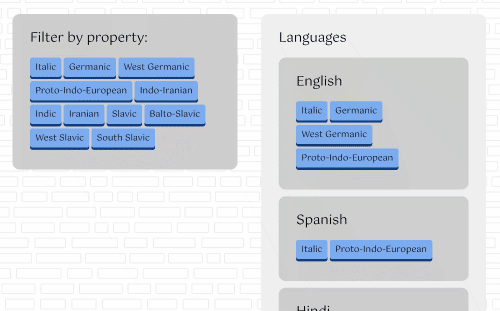
If you look at my resume page, my blog page, or my projects page, you'll notice a lot of tags that are designed to help people filter only the things that they're interested in.
Click on any of the tags - even the ones in the cards themselves - and the list will update to show only the cards that contain that tag. It's a very simple feature, but as I write more posts and take on more projects, I'm certain it'll prove a useful tool for users to filter out things that they don't have much interest in.
I created the tagging system from scratch, for various reasons that I'll go over later. The motivation was to take the cards - which already had the tags attached - and extract the tag data from them. Then, create a filtering system that would filter the cards based on their tags. Simple enough, but having already written most of the cards in HTML, I wanted something that could just use the data already existing in the DOM.
Why
This whole concept of taking pre-existing data in the DOM and using it to add a new dimension of interaction is why I converted my code into a library. The ideal use case would be a website that has already been built to serve a static or dynamic page, with a list of elements (think blog posts or cards) that have tags already embedded. If the maintainer of that site wanted to implement a tagging and filtering feature, it would be a shame for them to have to repeat themselves by getting the tags again. Remember - the tags are already in the cards.
Instead, dynamic-tags takes the data that's already been fetched, and uses it entirely client-side. While there are plenty of tagging libraries and tagging modules and tagging mixins that already exist, most of those are either dependent on npm and nodejs, and pretty much all require some form of allowlist to specify what tags to filter by. Sure, this allowlist can be fetched from an API or CMS, but why repeat yourself if the data is already there?
How
I think that provides a solid enough understanding of the motivation behind this project - either that, or I sound like a whiny child complaining about fetching tags and repeating requests. Either way, you're probably happy about the change of pace. It's time to write some code.
The first step is to find the container for the cards/posts, and assign all of the cards inside to an array.
Hey, it looks like you're on a slightly narrower screen. The code blocks below might not look too good, but the rest of the article should be fine. You can hop on a wider screen if you want to follow along. I'm not going anywhere (promise).
      const cardContainer = document.querySelector(".card-container");
      const cards = cardContainer.querySelectorAll(".card");
      var activeCards = cards;
      var tagDict = {};
      var tagFilter = [];

      cards.forEach(card => {
        card.querySelectorAll(".tag").forEach(tag => {
          let dataTag = tag.dataset.tag
          if (typeof tagDict[dataTag] == "undefined") {
            tagDict[dataTag] = [card];
          } else {
            tagDict[dataTag].push(card);
          }
        });
      });
The first two lines of code do exactly that - all of the cards are now stored inside the cards variable. We then - confusingly - assign the same array to the activeCards variable, an empty has to the tagDict variable, and an empty array to the tagFilter variable. Let's talk about what those variables will do. The activeCards variable keeps track of which cards are, well, active. We do this so that we can display the correct cards in the container. How? We filter it by the values in tagFilter. More on this very soon. Lastly, the tagDict variable is the brains behind the whole operation. It keeps track of what cards belong to which tags.
You can see that we're iterating through all the cards in the loop. For each card, we find all the tag elements that it contains, and for each of those tags, we extract the tag value. This is done by getting the dataset.tag property of each tag. If you haven't used the dataset property of an element, you should definitely try it. Values get assigned to the dataset when you create an attribute prepended with data-, for example like this:
      <div class="card card-1">
        <span class="tag" data-tag="spaghetti">spaghetti</span>
        <span class="tag" data-tag="orange">orange</span>
        <span class="tag" data-tag="spider">spider</span>
      </div>

      <div class="card card-2">
        <span class="tag" data-tag="bat">bat</span>
        <span class="tag" data-tag="orange">orange</span>
        <span class="tag" data-tag="blue">blue</span>
      </div>
This is why we can extract the tag data from the dataset.tag property. After this, we check to see if this tag has already been stored in the tagDict hash. If you're not sure how hashes work, they store key-value pairs. In this case, the key is the tag, and the value is the element. Think of it like a dictionary: the key is the word, and the value is the definition.
In this case, if the tag doesn't exist (i.e. a word doesn't have a definition in the dictionary), we add the element that the tag belongs to as its value. However, we first wrap that element in an array. This is important, since each tag may be part of multiple cards, and when we filter by a tag, we want to show all of the cards that contain the tag.
If the tag does exist, we simply take the array that we must have assigned earlier (otherwise the tag wouldn't exist), and we push the element onto that array. That is, we add the current card to the list of cards under the tag. It might take a minute to get, but that's okay. What's important is that the end result gives us all of the tags, pointing to all of the cards that contain each tag. In the case of the tags above, for example, tagDict would end up looking something like this:
      {
        spaghetti: [<div class="card card-1">...</div>]
        orange: [<div class="card card-1">...</div>, <div class="card card-2">...</div>]
        spider: [<div class="card card-1">...</div>]
        bat: [<div class="card card-2">...</div>]
        blue: [<div class="card card-2">...</div>]
      }
Once we have this lovely data structure set up, we need to use it. This is where all the filtering and appending and toggling magic happens.
First, we need a way to know what we're filtering by. This is why we have the tagFilter variable. So, all we have to do is add an EventListener to all the tag elements that adds their value to tagFilter when they're clicked. That looks something like this:
      document.querySelectorAll(".tag").forEach(tag => {
        tag.addEventListener('click', function() {
          toggleTag(tag.dataset.tag)
        }, false);
      });
The toggleTag function simply takes the tag, adds it to tagFilter, and then filters the cards:
      function toggleTag(tag) {
        let index = tagFilter.indexOf(tag);
        if (index > -1) {
          tagFilter.splice(index, 1);
        } else {
          tagFilter.push(tag);
        }

        if (tagFilter.length == 0) {
          activeCards = cards;
        } else {
          filterCards();
        }

        updateCards();
        updateTagActive();
      }
It might seem a little confusing, but let's step through it. First, we check to see if the tag is already active (hence the toggling in the name). If it is, we remove it from tagFilter. If it's not, we add it. Then, if tagFilter is empty, we reset our system, and set all cards to be active; i.e. we display all cards when there is no filter applied. If there are filters applied, we call the filterCards function, and then update the cards and the active tags. Let's look at these functions.
      function filterCards() {
        activeCards = Array.from(cards);
        tagFilter.forEach(tag => {
          activeCards = activeCards.filter(card => tagDict[tag].includes(card));
        });
      }
This function is very simple. It simply looks through all the tags in tagFilter, and for each tag, compares it to the active cards. It then only keeps the cards that contain that tag. By the end, activeCards contains only the cards that pass the filter. Now let's look at updateCards.
      function updateCards() {
        while (cardContainer.childNodes.length > 1) {
          cardContainer.removeChild(cardContainer.lastChild);
        }

        if (activeCards.length == 0) {
          cardContainer.append(noResult);
        } else {
          activeCards.forEach(card => {
            cardContainer.append(card);
          });
        }
      }
Again, a very simple function. We simply remove all the cards from the container, then append each of the active cards. If there are none, we append a small error informing the user that nothing matches their search. The reason we remove all the cards instead of selectively picking and choosing is to maintain the order of the cards. Finally, let's look at the last function, updateTagActive.
      function updateTagActive() {
        document.querySelectorAll(".tag").forEach(tag => {
          if (tagFilter.includes(tag.dataset.tag)) {
            tag.classList.add("active");
          } else {
            tag.classList.remove("active");
          }
        });
      }
Once again, it is a very simple function. A lot of the complex tagging behavior arises from the combination of simple parts, rather than one convoluted block of code. This function simply adds the active class to all the selected tags, which can then be styled accordingly. This informs the user which tags are selected, and which ones aren't.
As you can see, the tagging library is super simple. There is no need for convoluted external libraries or lots of conditional statements; with a little bit of JavaScript and some data structures, we were able to build a fully functional tagging script in less than 100 lines of code. Until next time!


Comments